Source: MovementbyDavid · YouTube · video ID QaKuVOhikaY · 22 August 2026
Five Stretches, One Repeatable Flexibility Practice
Mobility work becomes durable when it is not a heroic project. This five-part practice covers the hips, anterior body, lats, and upper back with a deliberately small dose: two 30-second holds per movement on weekdays.
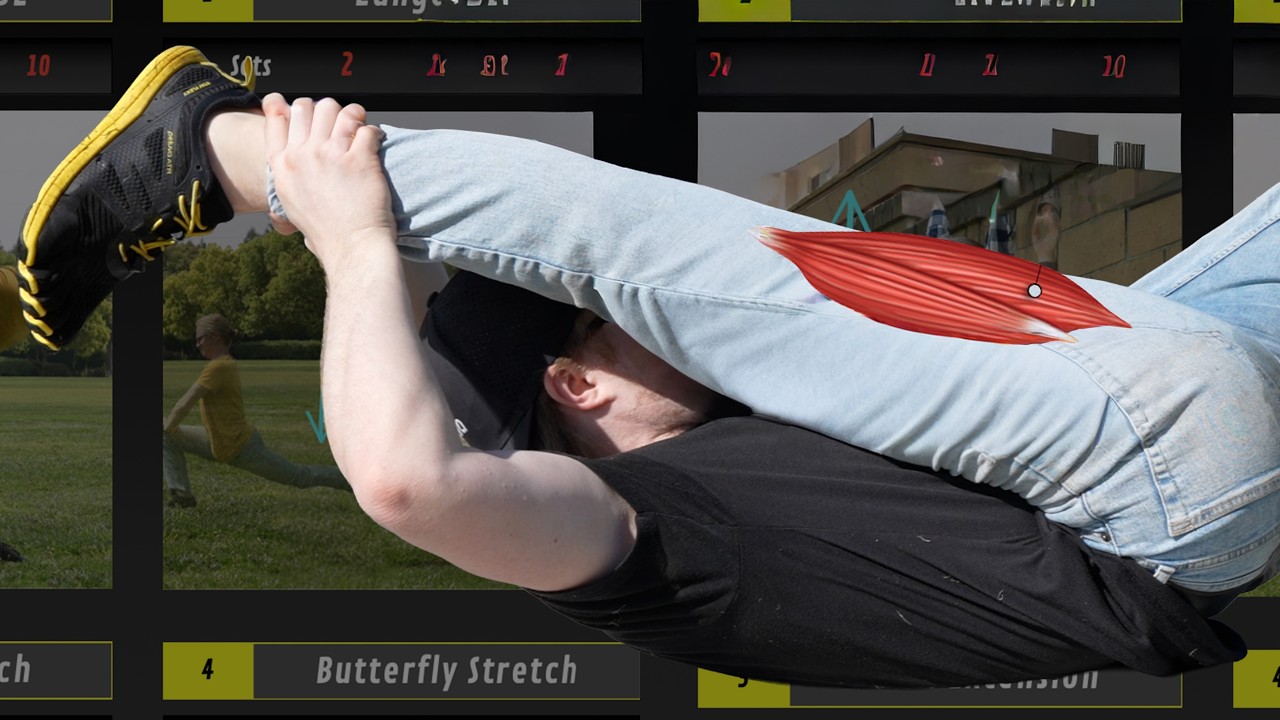
The promise is economy, not a magic shortcut
David Li’s case for a minimalist flexibility practice starts with an honest constraint: most people do not need an encyclopedia of drills; they need a few positions they will revisit often enough to make their range of motion useful. His five stretches are arranged across lower body, upper body, and spine, with easier and harder versions so the plan can scale without changing its identity.
The important distinction is between a complete mobility practice and a claim that five movements solve every individual limitation. The routine is a compact coverage map: hamstrings and adductors, external hip rotation and glutes, hip flexors, chest and biceps, lats, and thoracic extension. Pain, acute injury, neurological symptoms, or a joint-specific limitation call for assessment rather than forcing a deeper version.
1. The pancake is the lower-body anchor
The pancake stretch replaces the usual hunt for isolated hamstring and groin positions with a single seated wide-leg hinge. The easy entry is deliberately elevated: sit with the pelvis higher, open the legs, arch the back, and reach forward toward an object at a similar height. On the floor, progress goes from hands to elbows and then to increasingly deep torso contact—fist, forehead, chin, chest, and stomach.
That sequence matters because it makes progress visible without pretending the end range is a prerequisite. Li frames the target as comfortable floor sitting and easy toe access, while also treating a middle split as a later, optional extension rather than the immediate test of success.
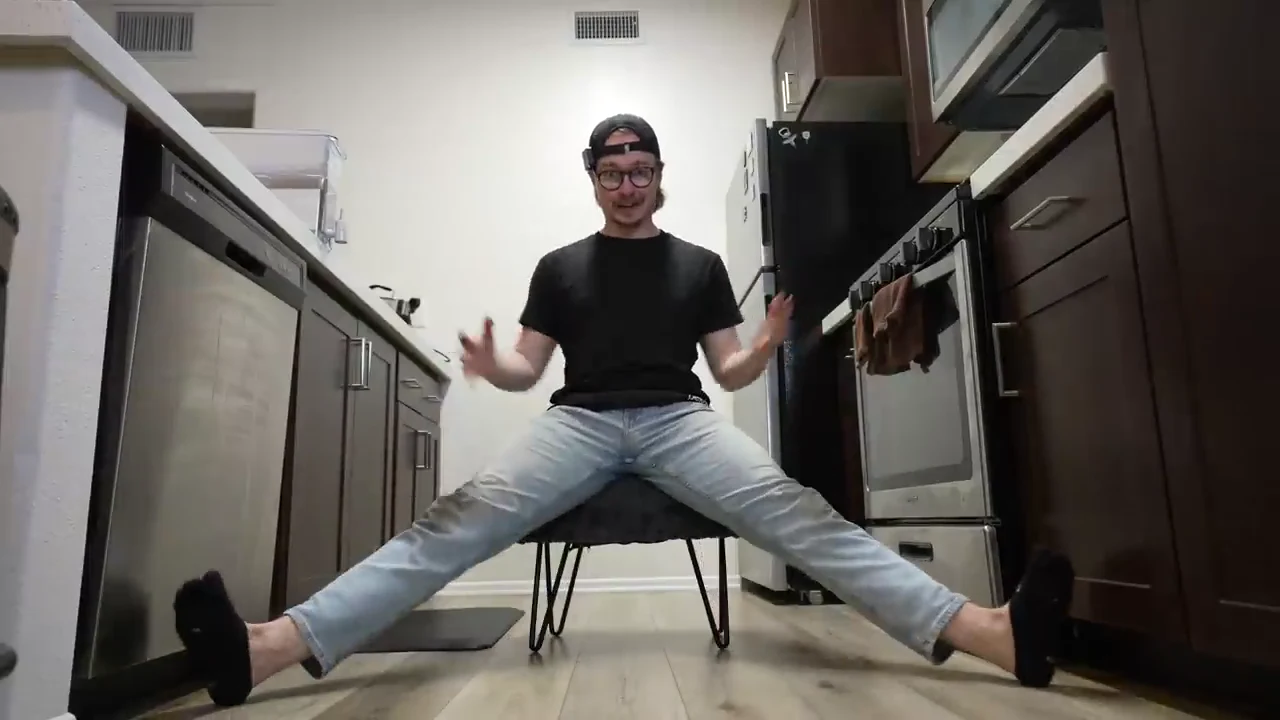
Elevated straddle
Sit high enough to keep a long spine. Open the legs and reach forward.
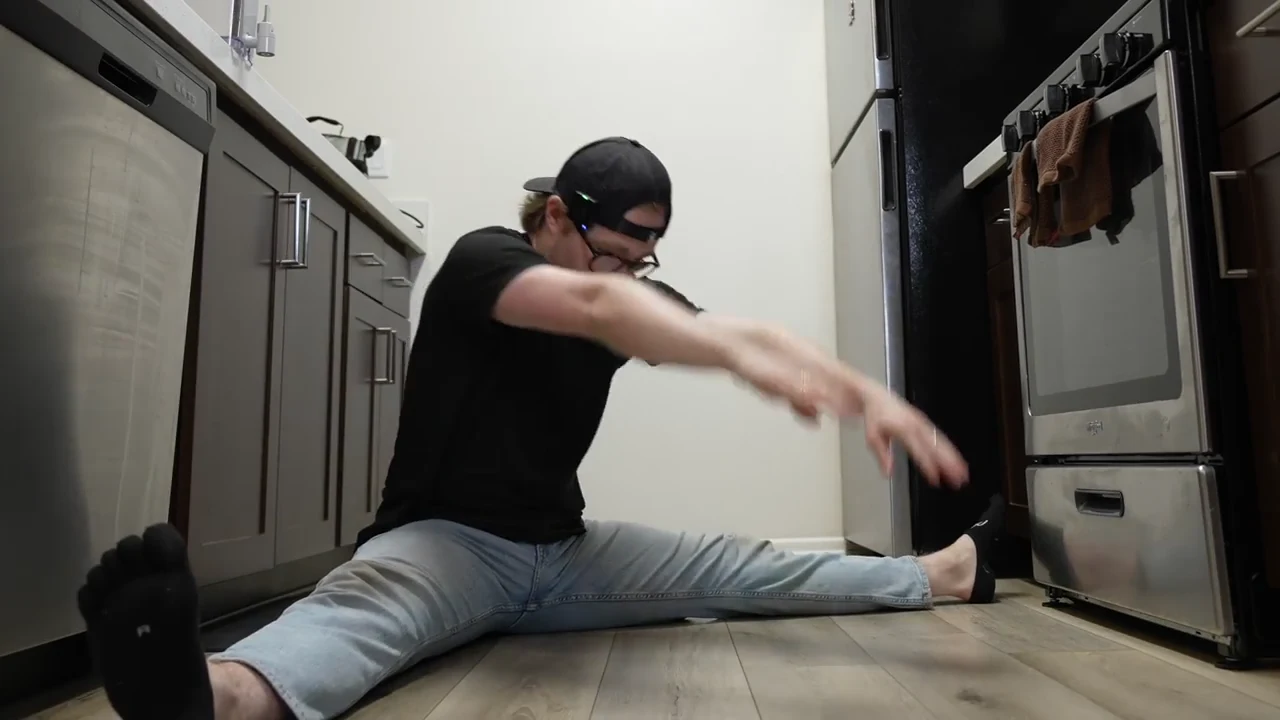
Hands first
Move to the floor. Reach with the hands before trying elbows or head contact.
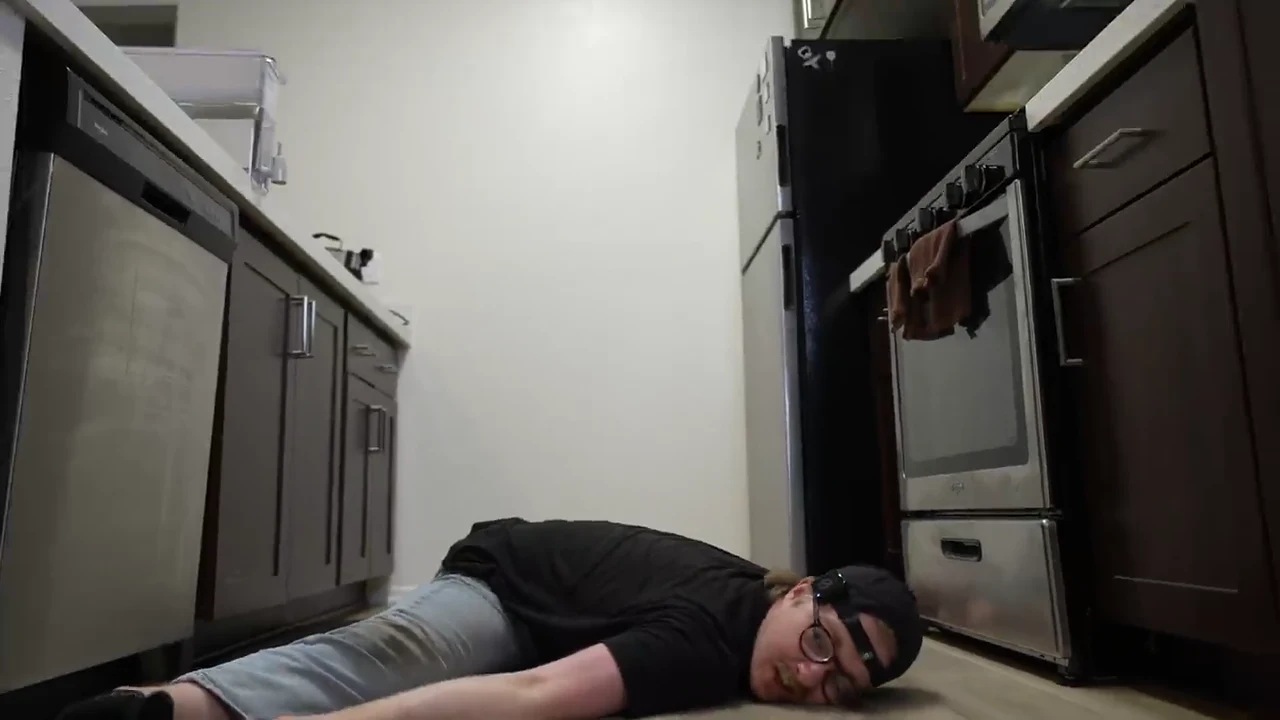
Torso toward floor
Increase depth only when the previous position is controlled and pain-free.
Full-resolution source frames at 1:28, 1:36, and 1:48. Progress is measured by controlled torso depth—not by forcing the knees or rounding aggressively.
2. Figure four turns a vague “stiff booty” complaint into a position
For the back and outside of the hip, the figure four stretch starts by crossing one leg over the other and leaning forward. The adjustment is unusually practical: if the knee is unhappy, bring it closer to the chest; if the position is inaccessible, use a strap or belt to help draw the leg in and let the foot move slightly to the side. The aim is a gluteal stretch, not a knee challenge.
The floor-based half pigeon is presented as the harder progression. That is a useful guardrail for the routine: the progression belongs to the hip only if the knee tolerates it. More depth is not automatically better.
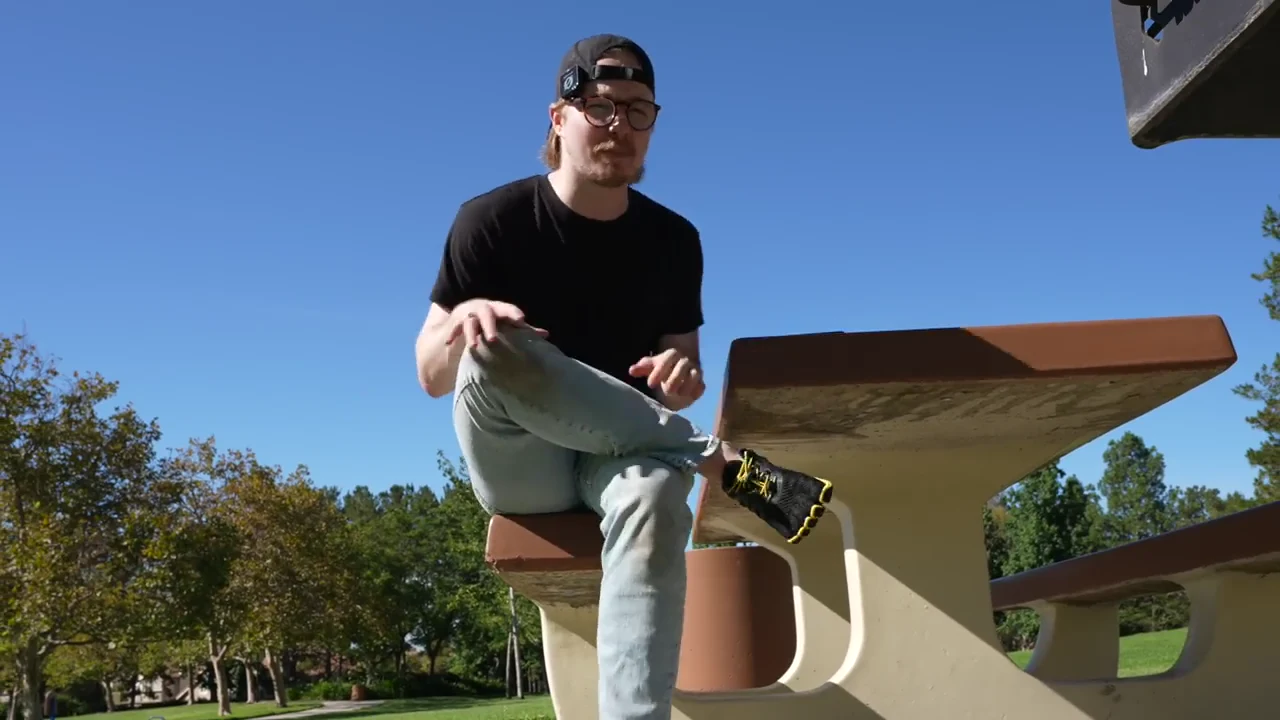
Seated figure four
Cross the ankle over the opposite thigh and hinge forward from the hips.
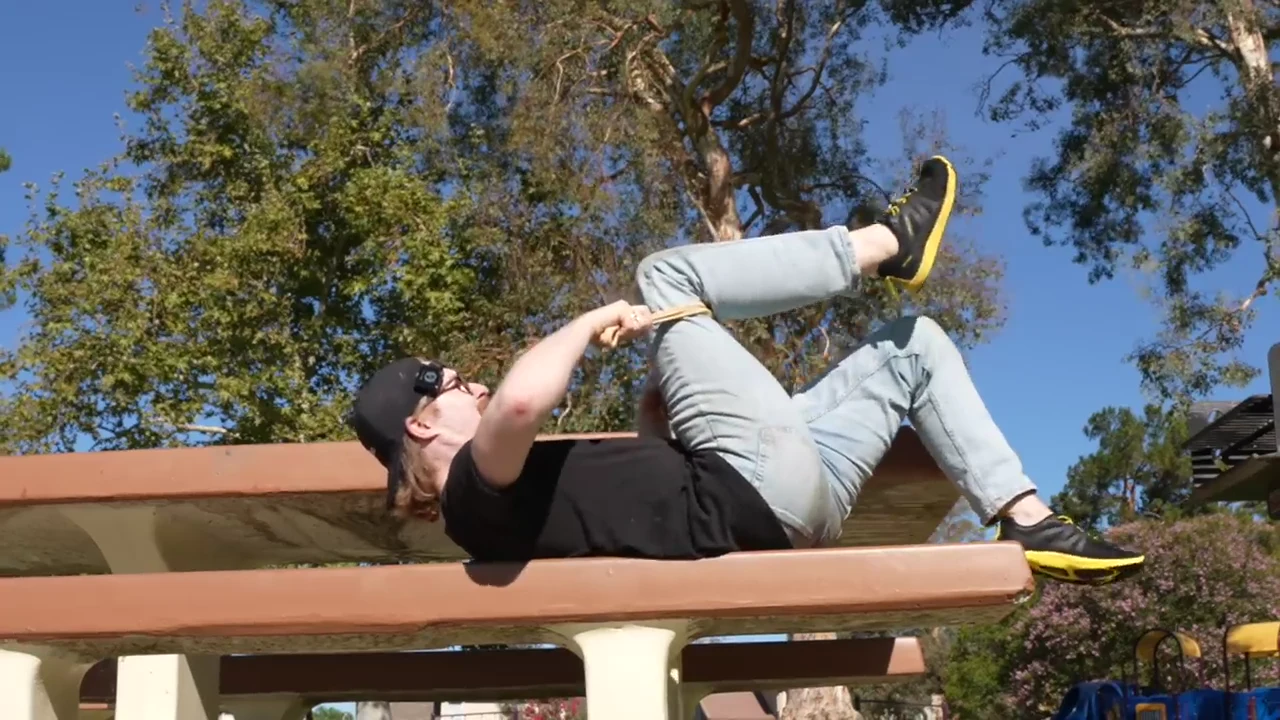
Supported pull
If the knee objects, lie back and pull the leg toward the chest without forcing the joint.
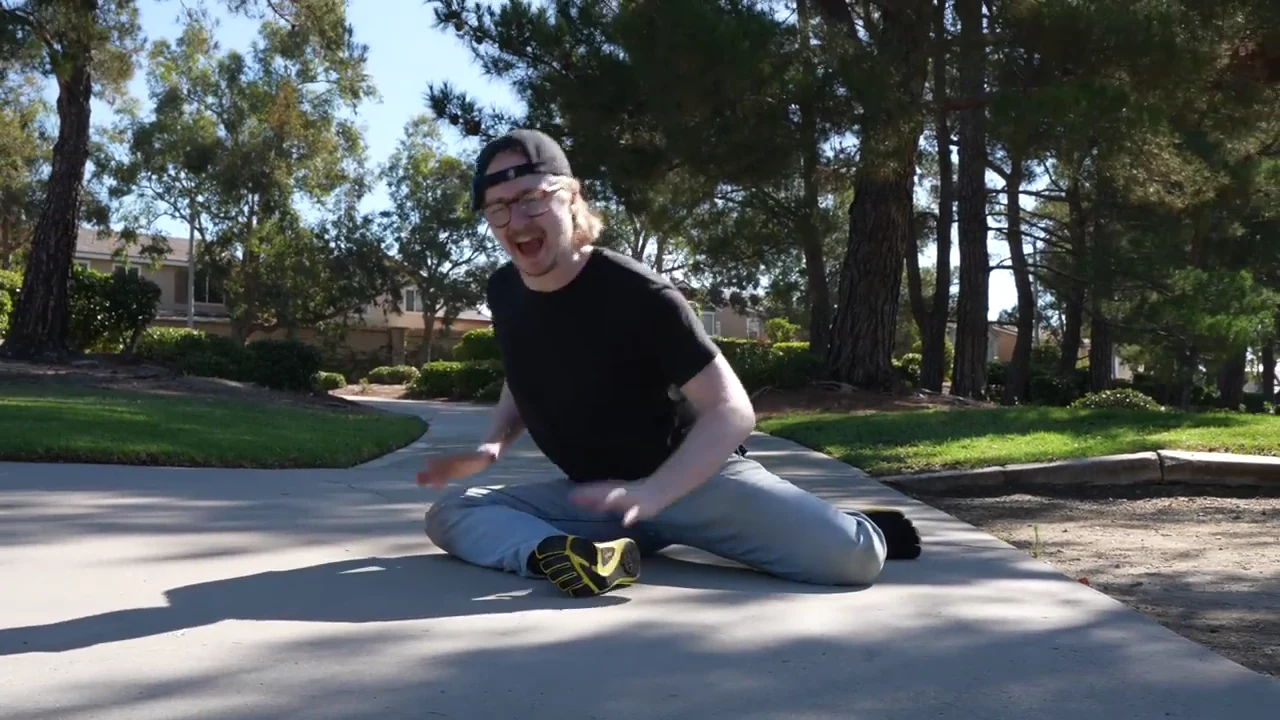
Half pigeon
Use the floor version only when the hip can rotate without knee pain.
Full-resolution source frames at 3:06, 3:18, and 3:30. The middle card is a modification, not a mandatory rung.
3. The lunge reaches from hip flexor into abdomen
The third position is a hip-flexor lunge with a side reach. Sink the hips while keeping them square rather than letting the pelvis rotate open or the front foot collapse. Then reach overhead and across. Li’s cue is intentionally demanding: the stretch should travel through the hip flexor and up into the abs, with small breaths rather than a held breath.
For a lower-entry version, start with the hips higher, hold a support for balance, and look upward. This is the one stretch that explicitly connects hip mobility and the trunk: Li notes that some hip flexors run through the pelvis toward the lower back, then uses the reach to add the anterior chain.
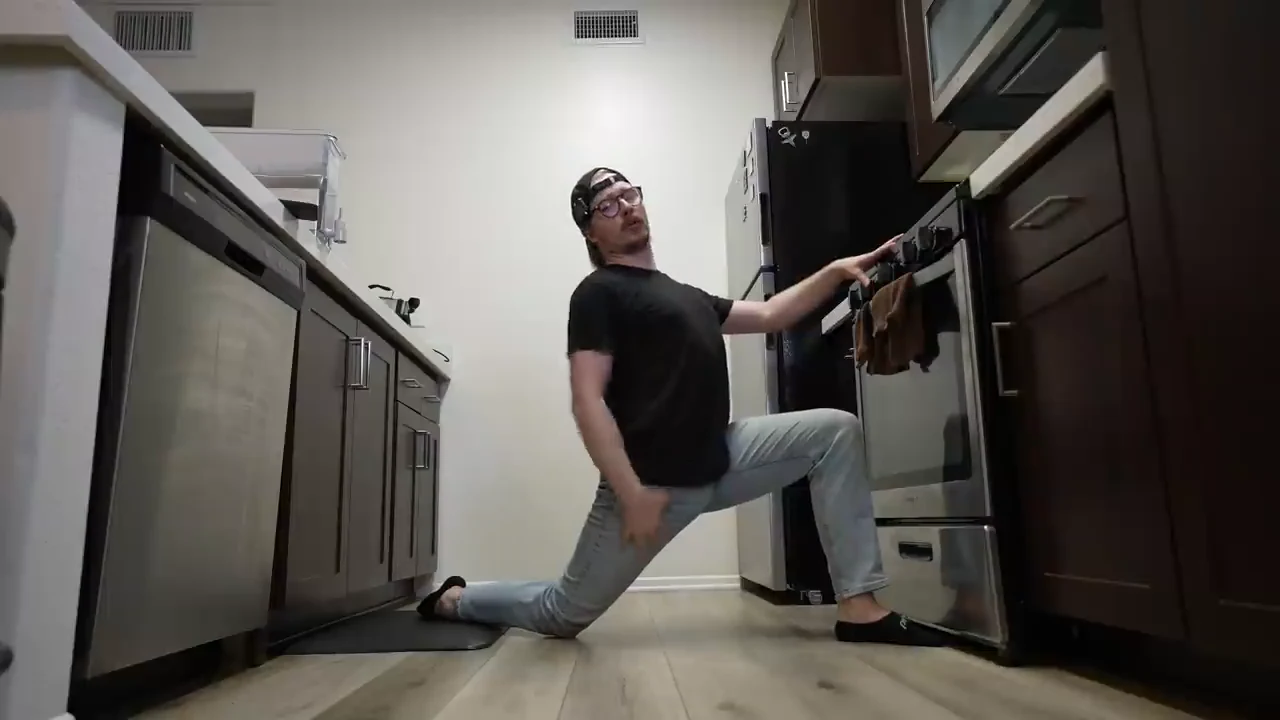
Higher and supported
Hold a stable surface, keep the lunge shallower, and square the hips.
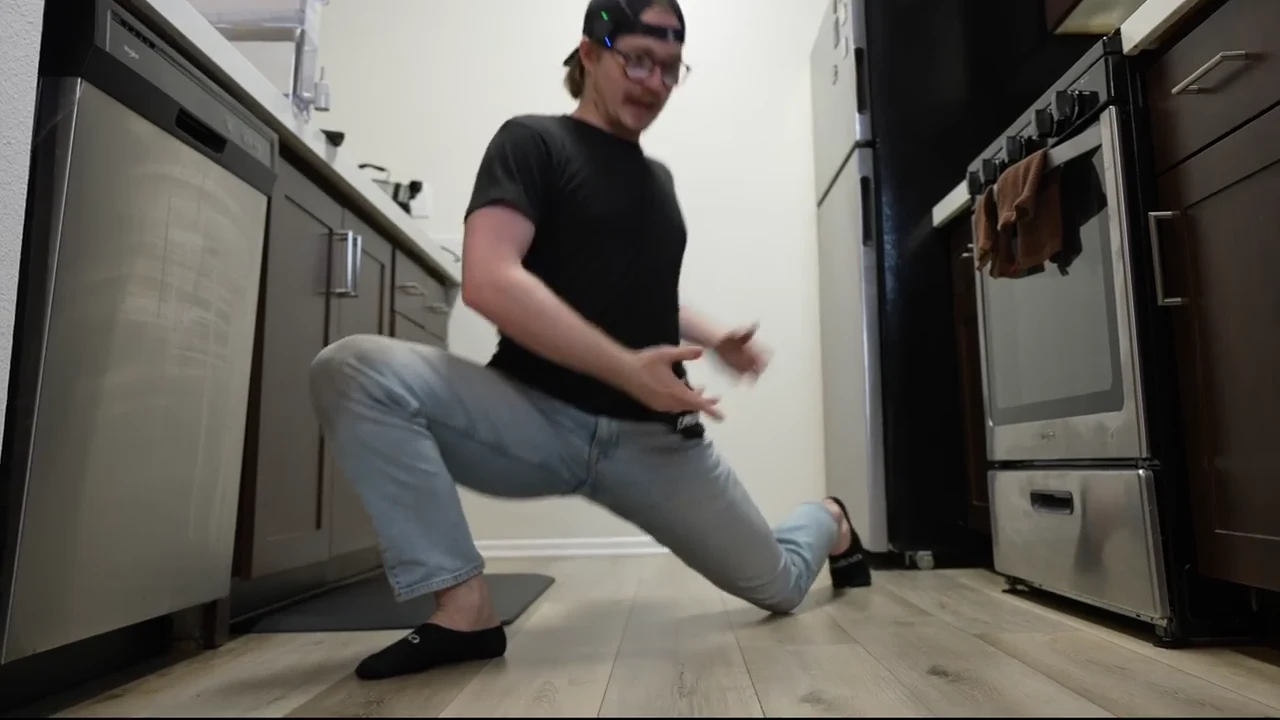
Square the pelvis
Sink into the lunge without letting the pelvis rotate open or the front foot collapse.
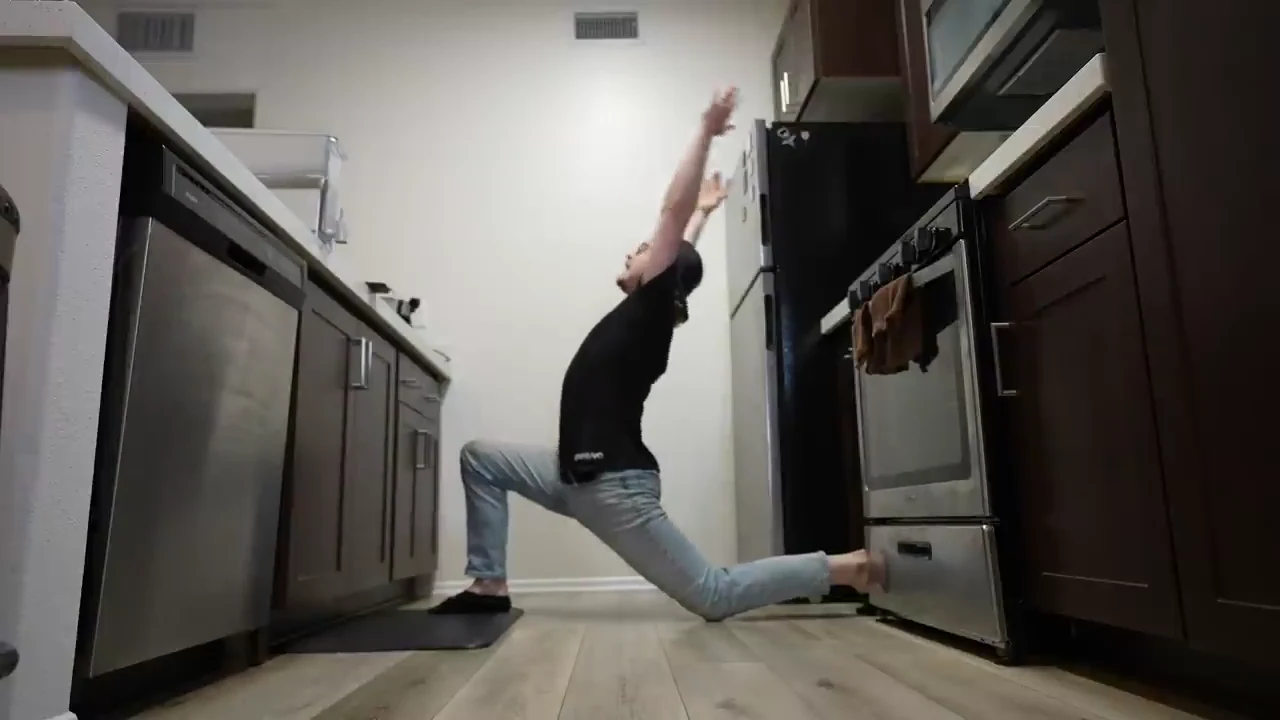
Reach up and over
Add the side reach while taking small breaths; the line should travel toward the abs.
Full-resolution source frames at 4:28, 4:04, and 4:12, reordered from easiest to most demanding.
4. A stick makes the chest stretch stay long enough to count
Li rejects the quick, commonly performed chest position because it only briefly reaches end range. His alternative—the jack stretch—uses a stick, broom, or belt. Place the bar on the shoulder, lift the chest, hold the implement with both hands, and push outward/back until the front of the chest and sometimes the biceps take the load.
Grip width is the built-in dial: wider is easier; narrower is substantially harder. The equipment is not the point. A belt can create the same relationship when a stick is unavailable, preserving the routine’s low-friction character.
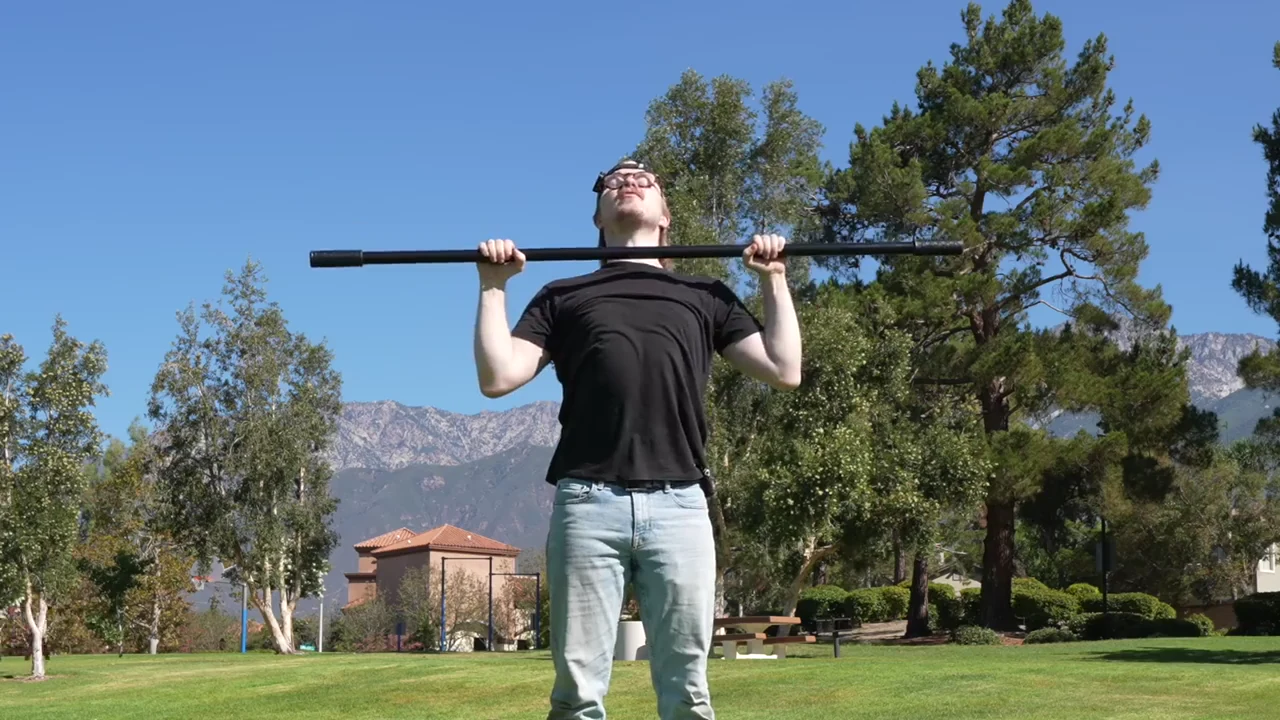
Begin wide
Start with hands far apart. A broom, pole, or belt can provide the same setup.

Set the shoulder
Place the implement across the shoulder line while keeping the chest lifted.
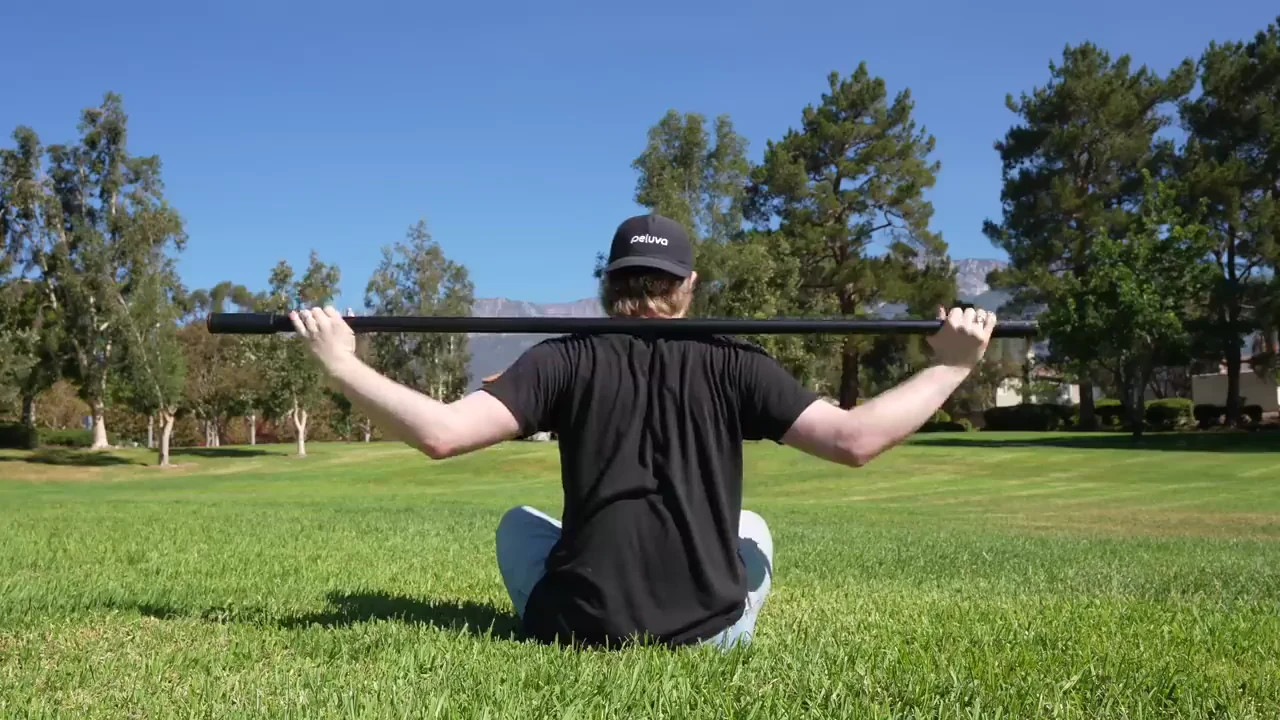
Press outward and back
Open the chest and biceps. Narrow the grip later—not before this feels controlled.
Full-resolution source frames at 5:26, 5:42, and 5:58. Grip width is the difficulty dial: wide is easier; narrow is harder.
5. Lat range is tied to overhead reach and upright posture
The fifth stretch targets the lats, which Li links to the ability to reach overhead and sit tall. Rather than prescribing one compulsory shape, he presents an easy-to-hard spectrum and asks the practitioner to choose a level that can become habitual. That is consistent with the rest of the program: a repeatable position beats a display of maximal flexibility.
He describes stretching as mechanical tension—“bodybuilding, but lengthwise.” It is a memorable metaphor, but it should not erase the distinction between building muscle, gaining tolerance in a range, and treating pain. In practice, the useful instruction is simpler: make the chosen position steady enough to breathe in and repeat.
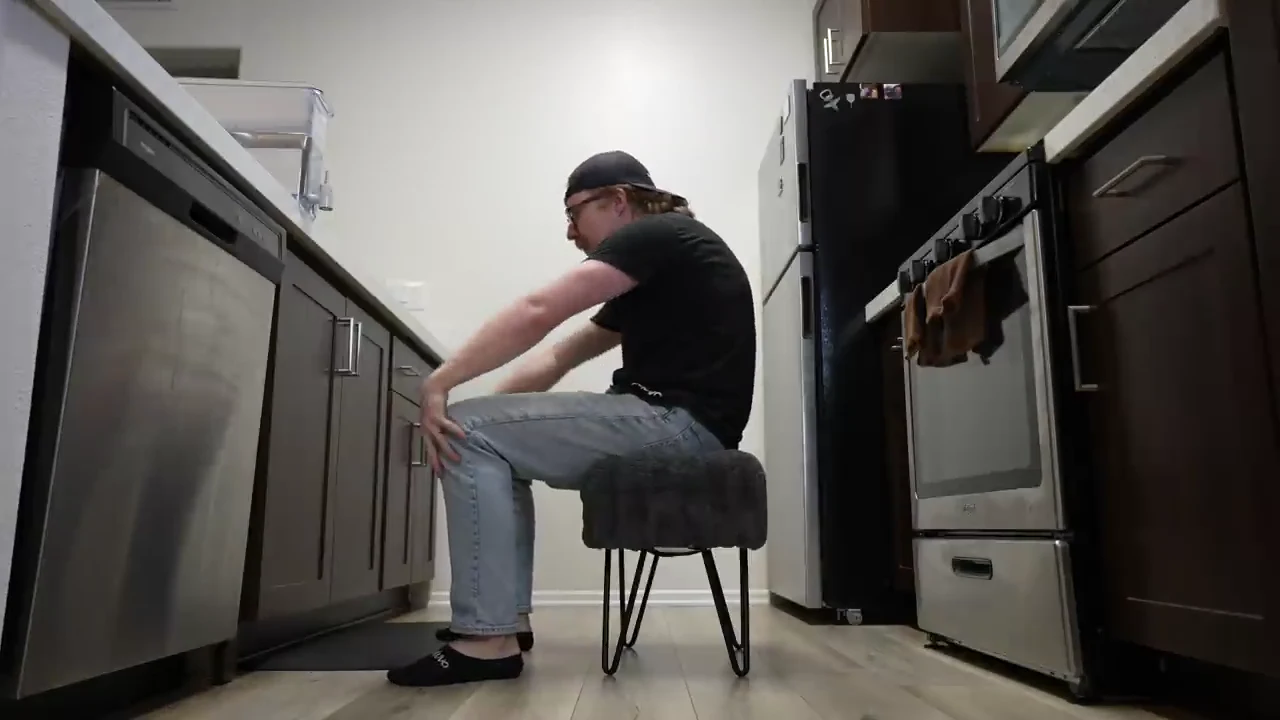
Chair-supported
Stay seated and use the support to create a gentle line through the side and lat.
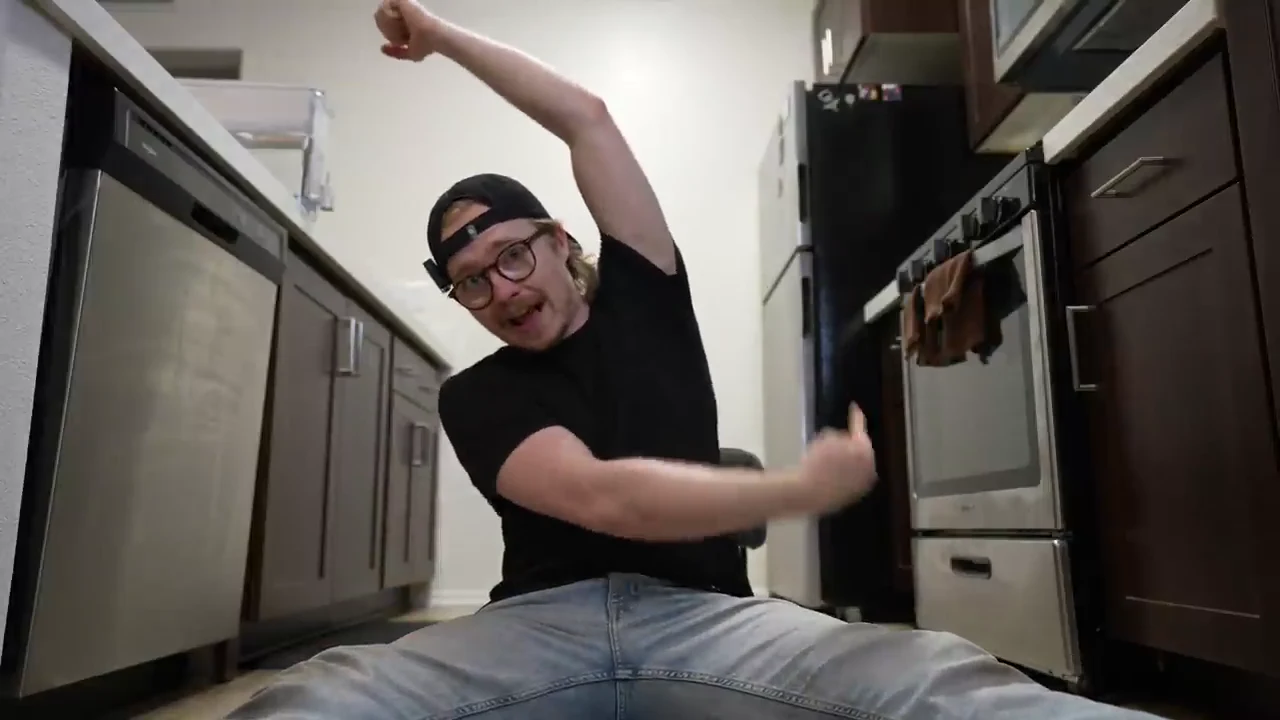
Seated side reach
Reach overhead while keeping the stretch steady enough to breathe.
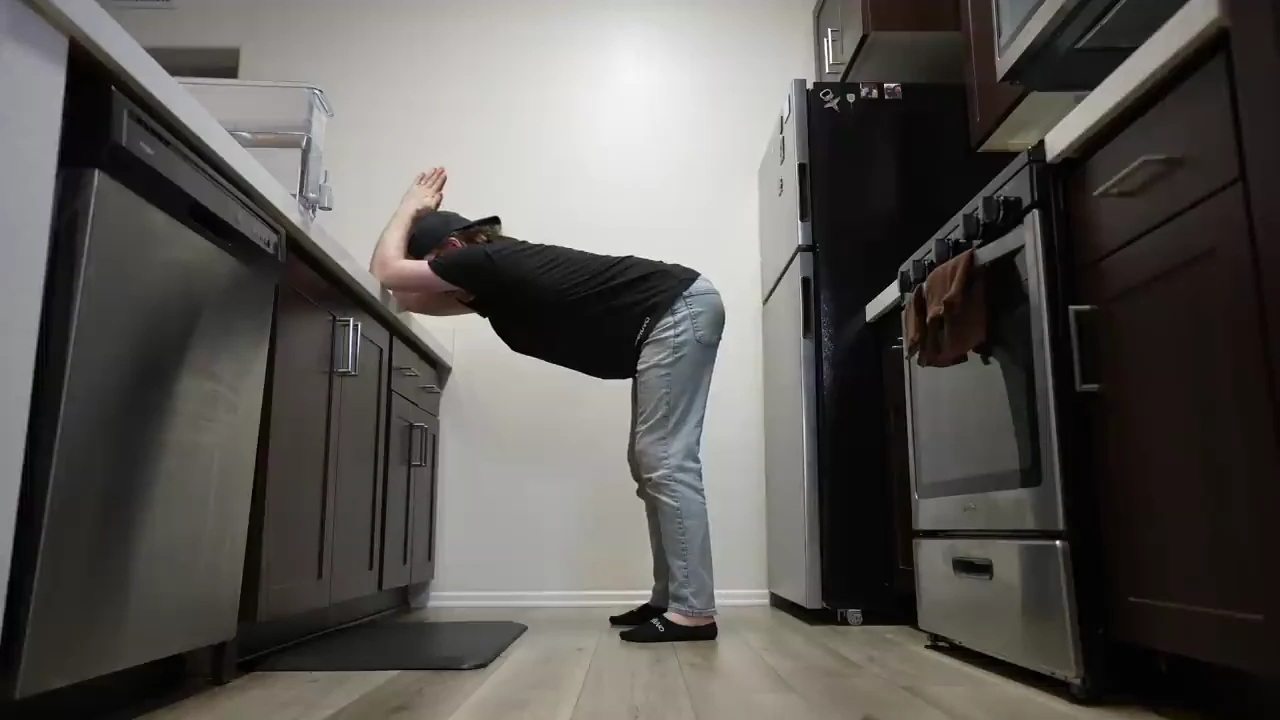
Standing wall hinge
Hinge at the hips and drive the chest down while the hands stay on the wall.
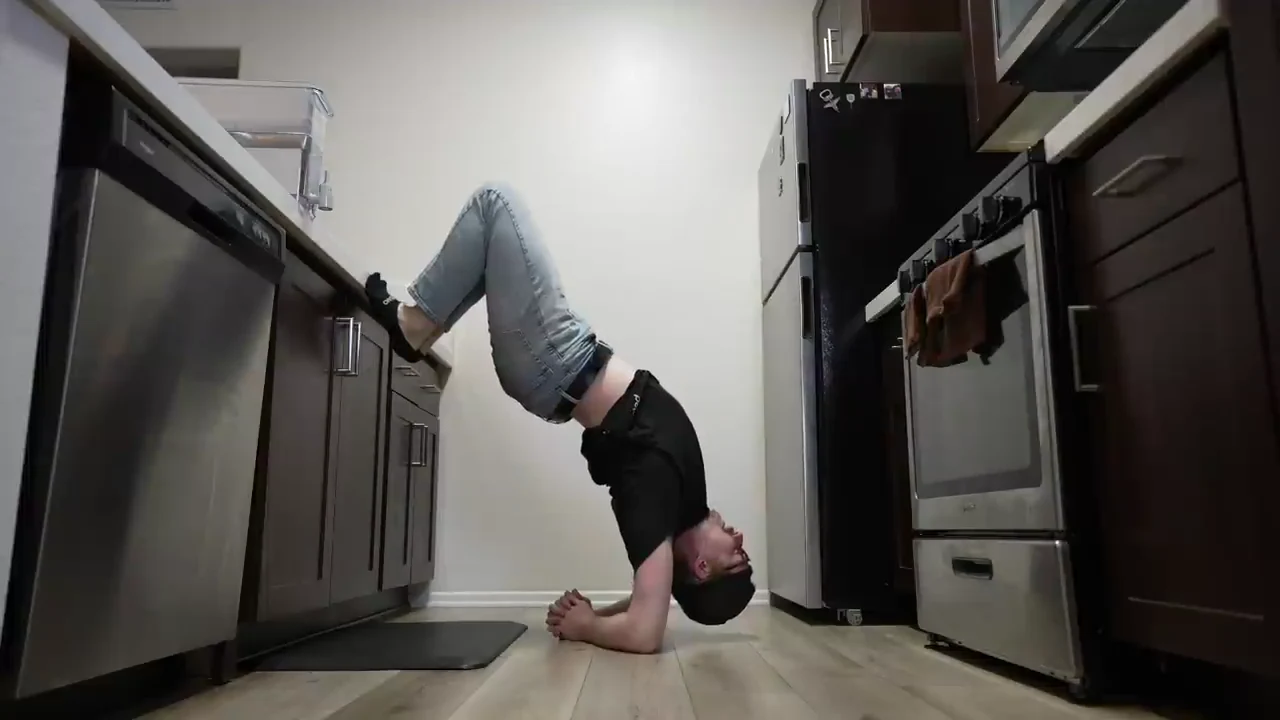
Inverted wall version
This is an optional advanced demonstration—not the default routine. Skip it without confidence and control.
Full-resolution source frames at 6:14, 6:18, 6:22, and 6:24. For the routine, the best level is the one you can repeat calmly.
The bonus that makes the plan more tennis-friendly: wall angels
After the five stretches, Li adds a posture drill rather than a sixth hold. For wall angels, pin the ribs to the wall, bring the elbows and wrists backward, and try to make the wrists touch without letting the ribs flare. The tension should register across the front of the chest and the upper thoracic spine. His prescription is 10 slow reps.
This turns “better posture” into a constraint-driven movement: ribs stay down, elbows and wrists travel back, then the rib position is checked again. It is a more actionable goal than simply standing taller.
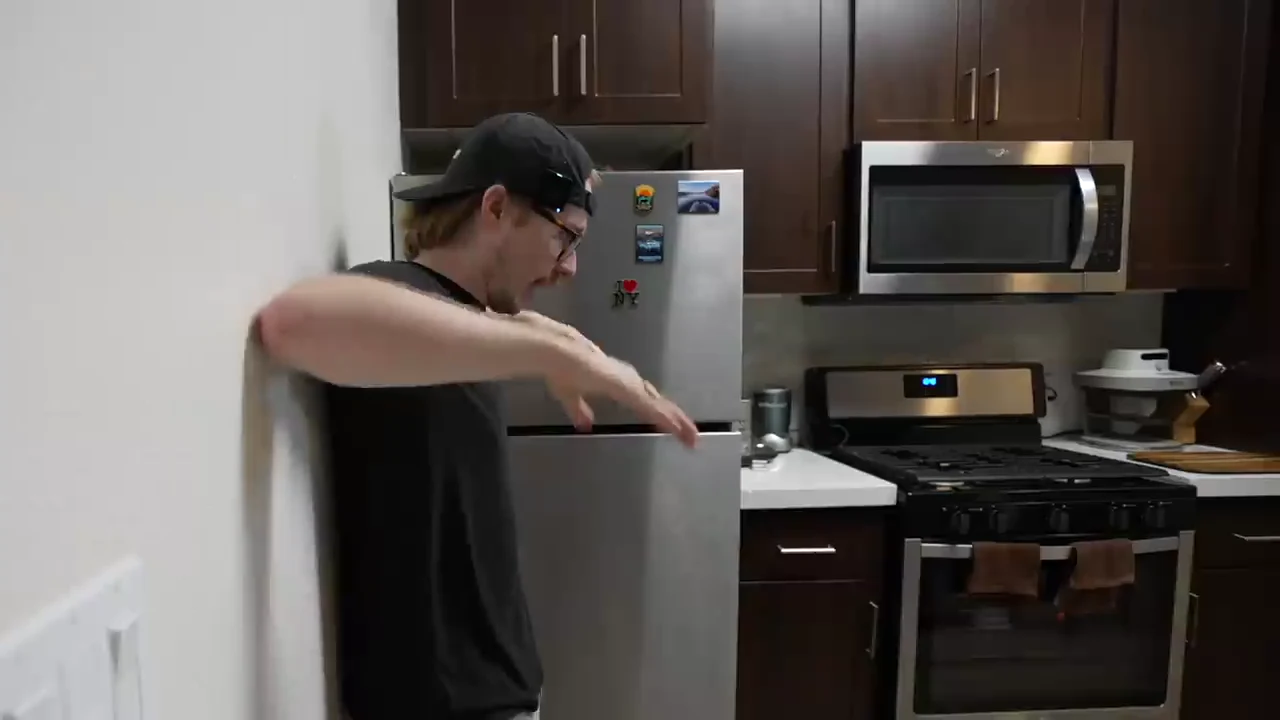
Ribs down
Press the ribs toward the wall before moving the arms.
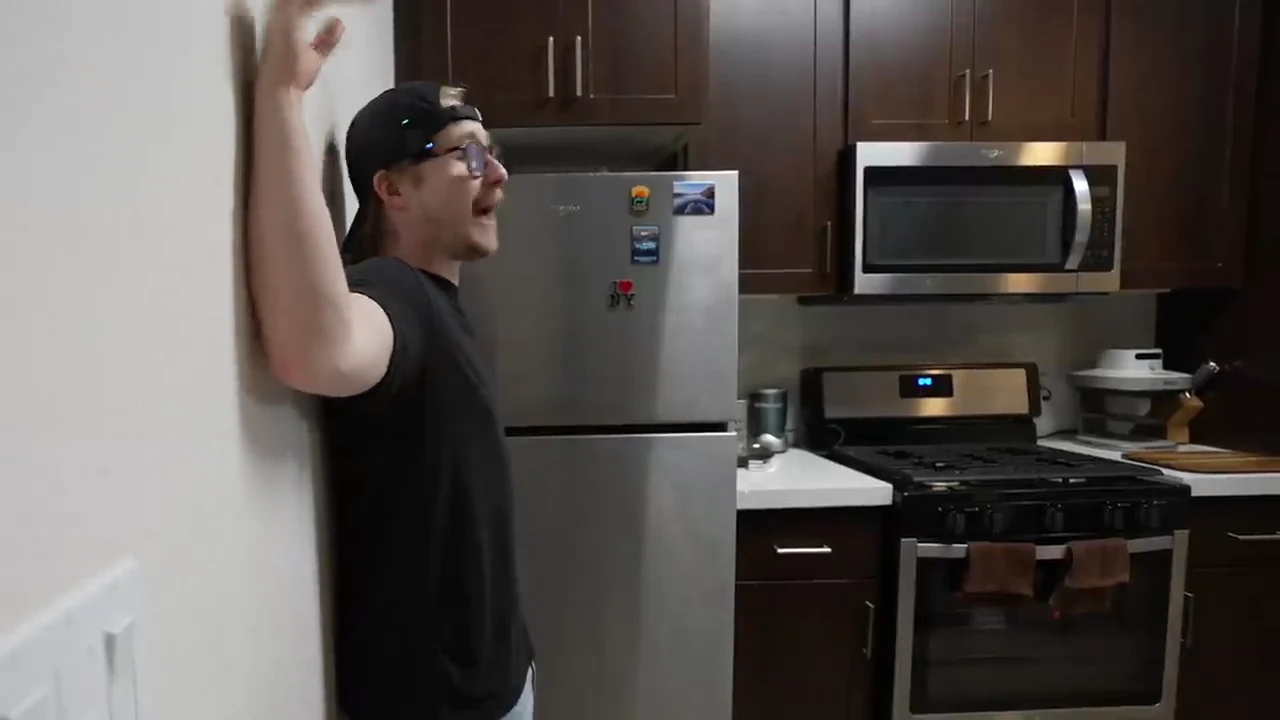
Wrists and elbows back
Slide upward only as far as you can without the ribs flaring away.
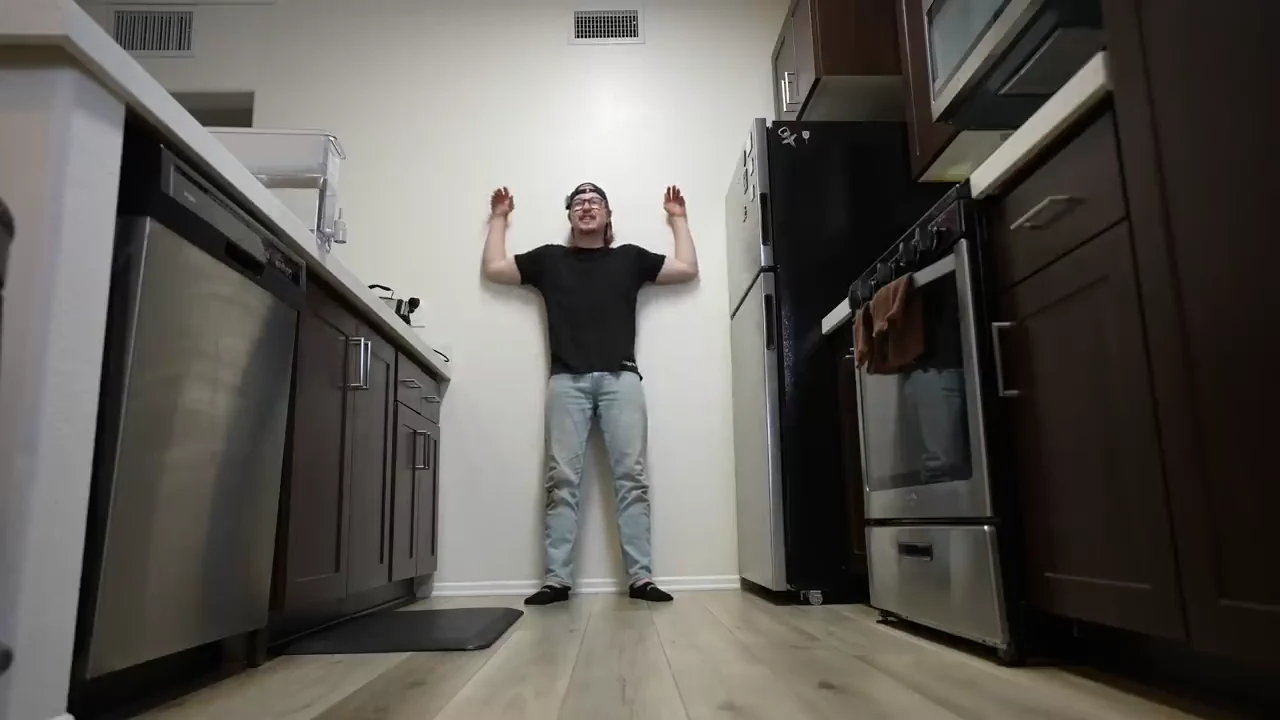
Return slowly
Complete ten slow reps. If the ribs lift, reset the position and shorten the range.
Full-resolution source frames at 7:08, 7:10, and 7:16. The rib position is the constraint; arm height is secondary.
A practical weekday template
| Movement | Coverage | Simple first version |
|---|---|---|
| Pancake stretch | Hamstrings, adductors | Elevate the pelvis; reach forward with an arched back. |
| Figure four | Glutes / outer hip | Cross leg and lean forward; pull the knee toward the chest if the knee objects. |
| Hip-flexor lunge + reach | Hip flexors, abs, back | Square the hips, use support, then reach up and over. |
| Jack stretch | Chest, biceps | Use a broom or belt with a wide grip; push outward and back. |
| Lat stretch | Lats, overhead range | Choose the easiest level that can be repeated comfortably. |
| Wall angels | Upper thoracic extension | 10 slow reps; ribs stay glued down. |
What transfers to your own practice
The routine’s strongest idea is behavioral, not exotic: turn flexibility into a brief, tracked exposure instead of an occasional long session. Keep one version of each movement for a week, record the level and whether the right and left sides differ, and only make the position harder when the current version is controlled. For an athlete who lifts and plays tennis, the hip, lat, chest, and thoracic work is most useful when it preserves comfortable range for training rather than when it chases a dramatic shape.
Source claims retained: five minutes per stretch weekly; 30-second holds; a weekday two-set schedule; the listed movement names, form cues, and progressions. Health caveat: this is general educational content, not a diagnosis or rehabilitation plan.